
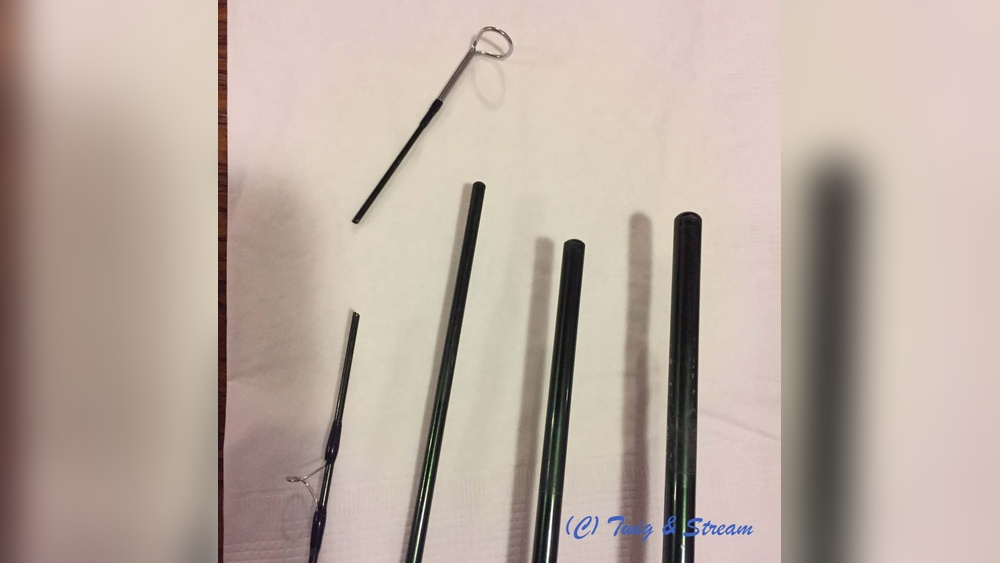
A fishing trip can turn from exciting to frustrating in seconds if your rod tip breaks. For many anglers, this is a common problem—sometimes the tip snaps while casting, other times it breaks during a fight with a big fish, or even in the car trunk.
But a broken fishing rod tip doesn’t mean your rod is ruined forever. With the right tools, a bit of patience, and good guidance, you can repair most broken tips yourself and get back on the water quickly.
Fixing a fishing rod tip is a practical skill every angler should know. Not only does it save money, but it also extends the life of your favorite rod. Many people think only professionals can do this repair, but the truth is, you can handle it at home—even if you’re new to rod building or repairs.
This guide will walk you through every step, from understanding why tips break to choosing repair materials, making the fix, and preventing future problems. Along the way, you’ll find examples, practical tips, and advice for both simple and more advanced repairs.
Why Fishing Rod Tips Break
Before you start the repair, it’s useful to understand why rod tips break. Knowing the cause can help you prevent future problems and choose the right fix.
- Accidental Impact: Hitting the rod against hard surfaces (rocks, boats, car doors) is the most common cause. Even a small crack can weaken the tip.
- High-Stress Loads: Fighting a large fish or lifting a heavy load with the tip can snap it.
- Manufacturing Defects: Rare, but sometimes rods have unseen flaws in the blank or guide wrapping.
- Improper Storage: Bending, crushing, or storing rods in tight spaces can stress the tip.
- Improper Casting Technique: Using too much force or “whipping” the rod puts pressure on the tip.
Two insights many beginners miss: First, even tiny cracks or chips in the finish can eventually turn into full breaks. Second, not all tip breaks are the same—some break cleanly, others splinter, which affects how you fix them.
Assessing The Damage
Before grabbing your glue or replacement parts, take a close look at the damage. This helps you decide what repair method to use.
- Clean Break vs. Splintered Break: A clean break (straight across) is easier to fix. Splintered or jagged breaks may need trimming.
- How Much Tip Is Lost: If only the very end (1-2 cm) is gone, a simple tip-top replacement works. If 5 cm or more is lost, your rod will be shorter and stiffer after repair.
- Is the Guide (Ring) Broken? : Sometimes, only the ceramic ring or the metal frame is damaged.
- Check for Hidden Cracks: Flex the rod gently and look for other cracks near the break.
If the blank (main shaft) is cracked beyond the tip section, or multiple guides are damaged, a full professional rebuild may be better.
Tools And Materials Needed
You don’t need expensive tools to fix a rod tip, but some items make the job easier and more reliable.
Essential Tools and Materials:
- Replacement tip-top guide (choose the right size)
- Rod tip glue or strong epoxy (hot melt glue for quick fixes)
- Sharp hobby knife or razor blade
- Fine sandpaper (220-320 grit)
- Small lighter or candle
- Cotton swab or small brush
- Ruler or tape measure
Optional but Helpful:
- Alcohol wipes (for cleaning)
- Small file (for smoothing)
- Rod wrapping thread (if re-wrapping)
- UV resin and UV light (for advanced repairs)
- Rod alignment tool (not required, but helps keep guides straight)
If you plan to do more repairs in the future, consider buying a rod repair kit. These are available at most tackle shops or online.
Choosing The Right Tip-top Guide
Not all rod tips are the same. You need a tip-top guide that matches your rod’s diameter and is suitable for your fishing style.
| Tip-Top Size | Rod Tip Diameter (mm) | Common Use |
|---|---|---|
| 4.0 | 1.6 | Ultralight, Spinning |
| 5.0 | 2.0 | Light/Medium, Spinning |
| 6.0 | 2.4 | Medium, Baitcasting |
| 7.0 | 2.8 | Heavy, Boat Rods |
How to Measure: Use a caliper or a tight-fitting hole gauge to measure the rod’s tip diameter (not the old guide’s tube). Match this to the inside diameter of the new tip-top guide.
Material Matters: Choose a guide material that matches your fishing style. For saltwater, stainless steel or titanium is best. For freshwater, hardloy or ceramic is common.
Pro Tip: Always carry a spare tip-top guide and glue in your tackle box. Many anglers forget this until they break a tip far from home.
Step-by-step Guide: Fixing A Broken Fishing Rod Tip
The following steps cover the most common repair: replacing a broken tip-top guide. This works for both spinning and baitcasting rods.
1. Remove The Broken Tip
First, cut away any splintered or jagged material so the end is smooth and straight. Use a sharp hobby knife or razor blade. Sand lightly with fine sandpaper to remove loose fibers and make a clean surface.
Be careful: Don’t cut too much. Every millimeter you remove makes your rod stiffer and shorter.
2. Clean The Tip Area
Wipe the cut end with an alcohol wipe or damp cloth. This removes dirt, old glue, and oils. Good cleaning means better glue bonding.
3. Test Fit The New Tip-top Guide
Slide the replacement tip-top guide onto the rod. It should fit snugly, but not require force. If it’s too tight, sand the rod lightly; if too loose, get a smaller guide.
Non-obvious tip: Slightly heating the guide tube before fitting makes it expand for easier placement.
4. Apply Glue
If using hot melt glue:
- Heat the glue stick with a lighter, then smear a small amount onto the rod tip.
- Quickly heat the tip-top guide tube for 2-3 seconds.
If using epoxy:
- Mix a small amount according to instructions.
- Use a cotton swab to put glue inside the tip-top guide tube.
Don’t use too much glue. Excess will squeeze out and make a mess.
5. Attach The Tip-top Guide
Quickly slide the guide onto the rod tip, rotating it so the guide ring lines up with the other guides on the rod. Hold it in place for 30-60 seconds (or as recommended for your glue).
6. Align The Guide
Before the glue sets, check alignment. Look down the rod from butt to tip. The new guide should form a straight line with the other guides. Adjust quickly if needed.
Beginners often forget: Even a slight misalignment affects casting accuracy and can cause line wear.
7. Let Glue Set
Allow glue or epoxy to fully set. For hot melt glue, this takes just minutes. Epoxy may need several hours to cure. Do not use the rod until glue is hard and cool.
8. Optional: Reinforce The Joint
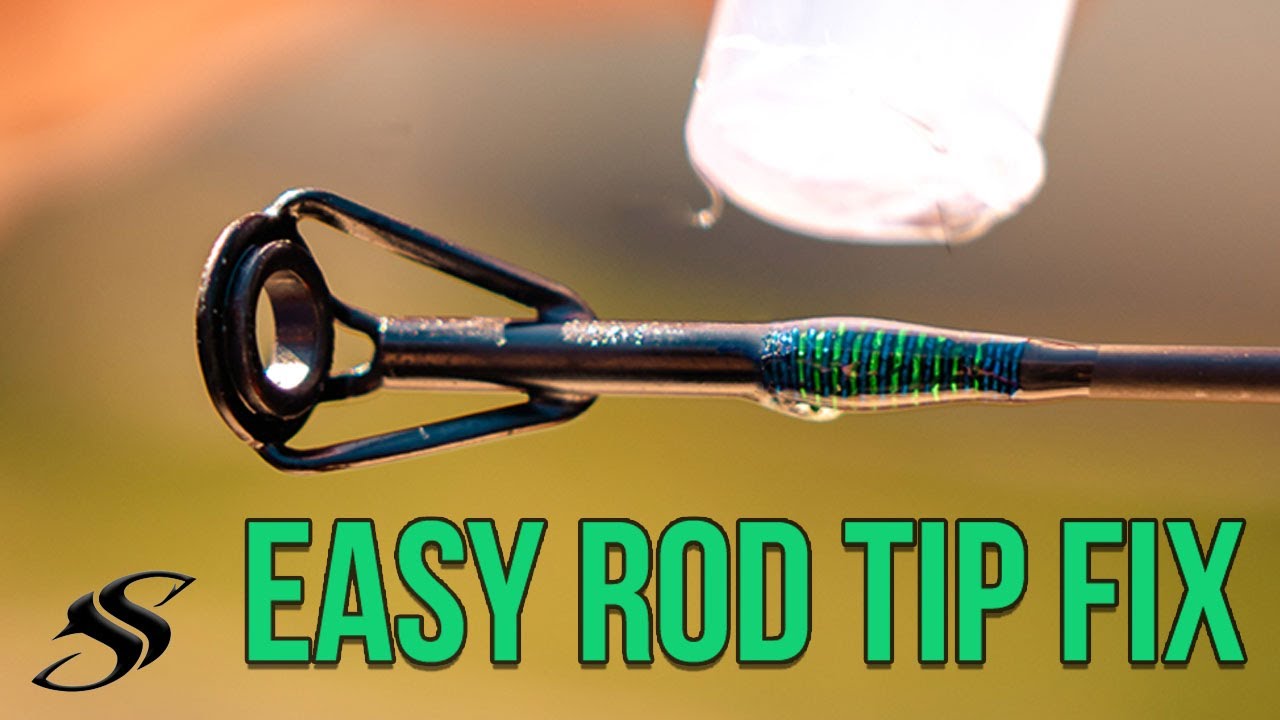
For extra strength, wrap the base of the new tip with rod wrapping thread (if you have it), then seal with a thin coat of epoxy or UV resin. This isn’t always necessary, but it adds durability for heavy use.
9. Test The Repair
Gently flex the rod, check the guide for movement, and run fishing line through all guides. If everything feels solid, your rod is ready for action.
Alternative Repair: Splicing A Broken Blank
If the rod broke not at the tip-top, but further down the blank, you may need to splice the rod. This repair is more advanced, but possible at home.
You’ll need:
- A short piece of hollow fiberglass or carbon tube (the “sleeve”) with an inner diameter just larger than your rod’s outer diameter.
- Epoxy glue.
- Sandpaper and a file.
Steps:
- Prepare the Broken Ends: Cut both broken rod ends clean and straight. Sand smooth.
- Test Fit the Sleeve: Slide the sleeve over one end. It should fit snugly but slide easily.
- Apply Epoxy: Coat both rod ends and the inside of the sleeve with epoxy.
- Join the Rod: Slide both ends into the sleeve, aligning the guides. Make sure the rod is straight.
- Secure and Cure: Hold in place with tape until epoxy cures (usually overnight).
- Re-wrap Guides: If a guide was near the break, rewrap it using rod thread and seal with epoxy.
Downside: The repair area will be slightly stiffer and heavier. Casting feel may change. For expensive rods, consider professional repair.
Common Mistakes To Avoid
Many repairs fail because of simple mistakes. Here are problems to watch for:
- Misaligned Guides: Not checking alignment before glue sets is a top error.
- Using Wrong Size Tip-Top: Too loose and it falls off, too tight and it cracks.
- Too Much or Too Little Glue: Excess glue looks messy and can affect line flow; too little means a weak bond.
- Skipping Cleaning: Dirt and oil stop glue from bonding well.
- Not Letting Glue Cure: Using the rod too soon can break the repair.
Extra tip: Always test your repair with moderate force before fishing. If it wiggles or creaks, re-glue it.
Advanced Repairs: Re-wrapping And Sealing
If your break damaged the rod wrapping or the blank near the tip, you may need to wrap thread and seal it.
Steps:
- Use rod building thread (not regular sewing thread).
- Wrap tightly and evenly, overlapping each turn.
- Finish with a drop of superglue or clear epoxy.
- For a professional look, use a rod drying motor to spin the rod while epoxy sets.
This step is optional for simple tip-top repairs but necessary for cracks or splinters below the tip.
Credit: www.youtube.com
How Much Strength Do You Lose After Repair?
Every repair changes your rod’s action. Shortening the tip makes the rod stiffer, which can affect casting distance and sensitivity.
| Tip Lost (cm) | Effect on Action | Effect on Sensitivity |
|---|---|---|
| 1-2 | Almost none | Very little |
| 3-5 | Slightly stiffer | Noticeable loss |
| 6+ | Much stiffer | Significant loss |
If you only lose 1-2 cm, the rod will feel almost the same. More than 5 cm, and the rod may become a “heavy action” rod, making it harder to cast light lures.
When To Repair And When To Replace
It’s not always worth fixing a rod tip. Consider these factors:
- Cost of Repair vs. New Rod: If the blank is badly damaged, buying a new rod may be smarter.
- Sentimental Value: Many anglers repair rods with memories attached, even if not perfect.
- Type of Fishing: For casual fishing, a repaired rod works fine. For tournaments or big fish, you may want a flawless rod.
If in doubt, ask at your local tackle shop. They can often repair or advise if replacement is better.

Credit: www.reddit.com
Preventing Future Tip Breaks
Good habits reduce the risk of breaking your rod again. Here’s how:
- Always Use a Rod Sleeve: This protects the tip during transport and storage.
- Be Gentle with the Tip: Never use the tip to pull lures free or lift heavy fish.
- Check for Damage Regularly: Small cracks grow over time. Fix them early.
- Store Rods Properly: Keep them straight, not bent, and away from heat sources.
- Use the Right Lure Weight: Overloading the rod stresses the tip.
Anglers often ignore: The rod tip is the most fragile part—treat it with care, and you’ll avoid most breaks.
Real-life Example: Repairing A Spinning Rod Tip
Let’s walk through a real-world example. Imagine you’re fishing for bass, and the last 2 cm of your spinning rod tip snaps off.
- You check the break—it’s clean and just the tip is lost.
- You measure the rod’s tip diameter at 2.0 mm.
- At the tackle shop, you buy a size 5.0 tip-top guide and a stick of rod tip glue.
- Using a razor, you smooth the break, then sand gently.
- You heat the glue, apply it, and slide on the new tip-top, aligning with the other guides.
- After cooling, you test the rod. It feels just a bit stiffer but casts well.
- You catch several fish the next weekend with no problems.
This type of repair costs under $10 and takes less than 20 minutes. The rod’s life is extended, and you gain confidence in doing your own fixes.
Expert Advice: When To See A Professional
Some repairs should be left to experts:
- High-end rods: If your rod is very expensive, professional repair ensures best performance.
- Multiple breaks: If more than one section is damaged, a full rebuild may be needed.
- Complex guide wraps: If decorative or heavy-duty wraps are involved, let a pro handle it.
Many tackle shops offer repair services for a reasonable fee. For tournament or serious anglers, this can be worth the investment.
Useful Resources For Rod Repair
Learning more about rod building and repair can make you a better angler and save money long-term. The Rod Building Forum and websites like Mud Hole offer tutorials, parts, and advice for all skill levels.

Credit: www.reddit.com
Frequently Asked Questions
What If The New Tip-top Guide Is Too Loose?
If the tip-top guide slides on too easily, try adding a thin layer of tape or thread to the rod tip before applying glue. This creates a tighter fit. Never force a tip-top that’s too small, as this can crack the rod or guide.
Can I Use Superglue Instead Of Rod Tip Glue Or Epoxy?
Superglue works in emergencies, but it’s not ideal for long-term repairs. It becomes brittle and can crack under stress or with temperature changes. For a lasting repair, use proper rod tip glue or a flexible epoxy.
How Do I Know What Size Tip-top Guide I Need?
Measure the outside diameter of your rod tip in millimeters using a caliper. Choose a tip-top with an inner tube diameter that matches. Most tackle shops have a sizing gauge or can help you find the correct size.
Will Repairing The Rod Affect Its Casting Performance?
A minor repair (1-2 cm loss) will have little effect on casting. If you lose more of the tip, the rod will become stiffer and less sensitive, which can change casting distance and lure action. For serious fishing, test the repaired rod before a big trip.
Is It Safe To Keep Fishing With A Cracked Tip?
No. Fishing with a cracked tip risks a sudden break, which can lose fish or even injure someone. Always repair or replace a damaged tip before using the rod again.
A broken fishing rod tip is not the end of your fishing adventures. With basic tools and a bit of know-how, you can repair most tip breaks yourself—saving money and getting back to catching fish fast. By following these steps, choosing the right materials, and avoiding common mistakes, you’ll keep your favorite rod in action for years to come.