

Making your own fishing lure molds is a rewarding skill that opens the door to custom tackle and greater success on the water. For many anglers, crafting lures is more than just a hobby—it’s a way to fine-tune baits for local fish, experiment with creative designs, and even save money over time.
However, the process can seem complex if you’re new to it. From choosing mold materials to pouring your first lure, there are many steps, tools, and tips to consider.
This guide walks you through every stage of making fishing lure molds, using simple English and clear instructions. Whether you want to copy a favorite lure or invent something unique, you’ll find practical advice, common pitfalls to avoid, and expert insights that help beginners get it right the first time.
Why Make Your Own Fishing Lure Molds?
There are several reasons anglers choose to make their own molds instead of buying ready-made lures or molds.
- Customization: You can create lures with the exact shape, size, and action that fits your fishing style or the local fish species.
- Cost Savings: After the initial investment, homemade molds allow you to produce many lures for a fraction of the store price.
- Creativity: Design unique colors, patterns, or features that are not available commercially.
- Learning Experience: Building molds teaches valuable skills, from basic casting to advanced crafting.
Many fishermen also find lure making relaxing and satisfying—a way to connect with the sport even when they can’t be out on the water.
Types Of Fishing Lure Molds
Choosing the right type of mold is essential for your success. The main types are:
- Soft Plastic Molds: Used for making soft baits like worms, grubs, and swimbaits.
- Hard Bait Molds: For crankbaits, jerkbaits, and other hard-bodied lures.
- Jig and Spinner Molds: Used to shape metal jig heads, spoons, or spinners.
Comparison Of Mold Types
Below is a comparison to help you choose the best mold for your needs.
| Mold Type | Materials Used | Best For | Difficulty Level |
|---|---|---|---|
| Soft Plastic | Silicone, Plaster | Worms, Grubs, Swimbaits | Beginner-Friendly |
| Hard Bait | Aluminum, Epoxy | Crankbaits, Topwater | Intermediate |
| Jig/Spinner | Aluminum, Steel | Jig Heads, Spoons | Advanced |
For most beginners, soft plastic molds are a great starting point. They use safe, affordable materials and need basic tools. Hard bait or metal molds need more skill and equipment.

Credit: www.amazon.com
Essential Tools And Materials
Before you start, gather all the tools and materials you’ll need. The list below covers the basics for making a soft plastic lure mold—the most common beginner project.
Tools
- Master lure (original bait or prototype)
- Mixing cups and sticks
- Measuring spoons
- Craft knife or scalpel
- Clamps or weights
- Rubber gloves
- Protective eyewear
- Small paintbrush
Materials
- Silicone rubber (mold-making grade)
- Mold box (plastic container or custom frame)
- Release agent (prevents sticking)
- Soft plastic lure material (plastisol or soft bait resin)
- Colorant and glitter (optional)
- Cooking oil or petroleum jelly (as a DIY release agent)
For hard bait or jig molds, you will need extra items like aluminum blocks, files, and sometimes a drill press. But for most home lure makers, silicone rubber and household items are enough.
Cost Breakdown Example
Here’s a rough cost comparison for making a basic silicone mold versus buying a commercial mold.
| Item | DIY Mold Cost | Store-Bought Mold Cost |
|---|---|---|
| Silicone (500g) | $15 | – |
| Release Agent | $5 | – |
| Mold Box/Tools | $10 (one-time) | – |
| Commercial Mold | – | $40–$60 |
| Total | $30 | $40–$60 |
Once you have the basic tools, you can make multiple molds for even less.
Step-by-step Guide: Making A Soft Plastic Lure Mold
Let’s walk through the process for creating a two-part silicone mold, which is ideal for most soft plastic lures.
1. Prepare The Master Lure
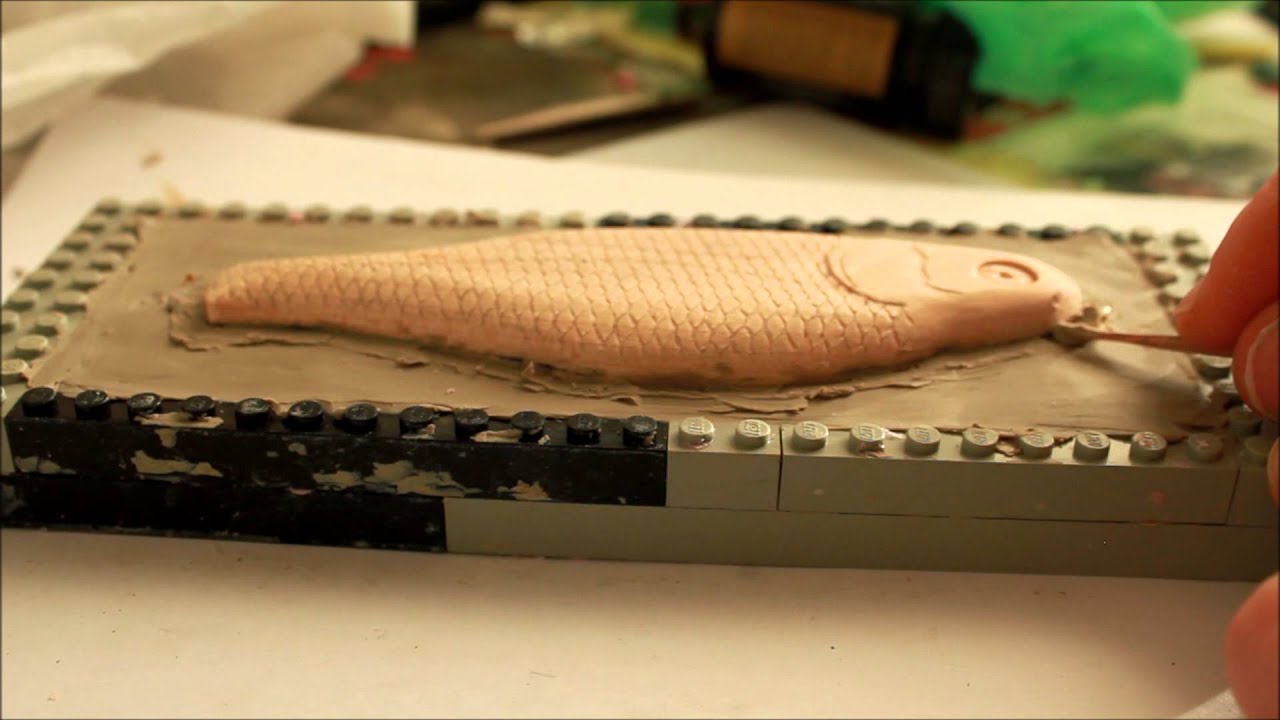
The master lure is the original shape you want to copy. It can be a store-bought bait, a hand-carved prototype, or even a 3D-printed model. Clean it thoroughly and remove any dirt or oil.
Pro Tip
If you want to adjust the lure’s action or size, make changes to the master now. For example, you can add weight, trim the tail, or use clay to fill gaps.
2. Build The Mold Box
The mold box holds the silicone while it sets. It should be just a bit larger than the lure. You can use a plastic food container, a small cardboard box, or build a custom frame from wood or acrylic.
- Secure the master lure in the center using hot glue or a small dab of clay.
- The lure should not touch the sides or bottom to avoid leaks.
3. Apply Release Agent
Spray or brush a release agent over the master lure and inside the mold box. This step is important—if you skip it, the silicone may stick and ruin the mold.
Non-obvious Insight
A light coating of cooking oil or petroleum jelly works as a cheap release agent for silicone. However, for best results, use a commercial product made for mold making.
4. Mix And Pour Silicone
Follow the manufacturer’s instructions to mix the silicone rubber. Most types need equal parts of two liquids (Part A and Part B).
- Stir slowly to avoid bubbles.
- Pour a thin stream over the master, letting silicone flow around all details.
- Tap the box gently to pop air bubbles.
Let the first half cure fully (usually 4–8 hours at room temperature).
5. Create Registration Keys
Registration keys help align the two mold halves perfectly. After the first silicone half sets, press a pencil or the back of a paintbrush into the surface to make a few shallow holes.
6. Pour The Second Half
- Brush a fresh layer of release agent over the cured silicone and master lure.
- Mix and pour the second batch of silicone.
- Allow to cure as before.
7. Remove The Master And Trim
Carefully open the mold and remove the master lure. Trim any thin silicone “flashing” with a craft knife. Cut a small pour hole (sprue) where you’ll inject the plastic.
Advanced Tip
You can add vent channels with a thin knife to help air escape during pouring. This prevents bubbles in your finished lure.
8. Casting Your First Lure
- Clamp the two mold halves together.
- Heat your plastisol or soft bait material as directed (usually 300–350°F).
- Carefully pour or inject the plastic into the sprue.
- Let the lure cool, then open the mold and remove your new bait.
Making Hard Bait And Jig Molds
If you want to create hard lures or metal jigs, the process is similar but uses different materials and safety steps.
Hard Bait Molds
- Material: Aluminum or high-strength epoxy.
- Process: Carve the mold cavity using files or a CNC machine.
- Safety: Wear eye and dust protection when working with metal or epoxy.
Jig And Spinner Molds
- Material: Most often aluminum.
- Process: Drill and carve the cavity to the exact jig shape. Secure hooks and wire in place before pouring molten lead.
- Safety: Lead is toxic. Always work outdoors, wear a respirator, and avoid skin contact.
Not-so-obvious Insight
Many advanced anglers use 3D printing to create masters or even direct molds for hard baits. While the cost is higher, the detail and repeatability can be impressive.
Common Mistakes And How To Avoid Them
Beginners often face the same challenges. Here’s how to sidestep them:
- Air Bubbles: Mixing silicone too fast or not tapping the mold box can trap air. Pour slowly and tap gently.
- Poor Alignment: Skipping registration keys leads to misaligned lures. Always make at least two keys.
- Stuck Master: Forgetting the release agent often ruins both the master and the mold.
- Weak Molds: Using cheap or old silicone can cause tears. Always check expiration dates and buy from trusted brands.
- Burned Plastic: Overheating plastisol creates fumes and can ruin your lure. Use a thermometer and heat slowly.
Credit: www.youtube.com
Customizing Your Lures
One huge advantage of homemade molds is the ability to create unique baits. Here are ways to customize:
- Add color: Mix colorants or glitter into your soft plastic.
- Modify shape: Use clay or wax to add fins, eyes, or other features to your master.
- Add scent: Many anglers mix scent into the plastic or brush it on after cooling.
- Embed weights: For jigs or heavy soft baits, you can insert lead or steel shot before pouring.
Safety Tips
Making fishing lure molds is safe if you follow some simple rules:
- Always use gloves and eye protection when handling chemicals.
- Work in a well-ventilated area, especially when heating plastisol or pouring lead.
- Never reuse kitchen tools for food after using them for lure making.
- Store all materials away from children and pets.

Credit: www.youtube.com
Improving Your Results
Even experienced anglers continue to refine their lure-making techniques. Here are some expert tips:
- Use a pressure pot: For perfect, bubble-free molds, advanced makers use a pressure pot to cure silicone.
- Try different silicones: Not all silicone rubbers are the same. Some are softer, some are more durable. Test a few brands to see what works best for your needs.
- Keep notes: Write down your recipes, temperatures, and results. This helps you repeat successful batches and fix problems.
- Network: Join online forums or local clubs. Experienced makers often share helpful advice and troubleshooting tips.
Environmental Considerations
Homemade lures can help reduce plastic waste, especially if you recycle old baits. Here are some ways to make your hobby greener:
- Recycle failed lures: Old or ruined soft baits can be reheated and repoured.
- Use non-toxic materials: Choose lead-free metals and phthalate-free plastisols when possible.
- Dispose of waste properly: Never pour leftover chemicals down the drain. Check local rules for disposal.
Where To Learn More
Many anglers learn lure making through online videos, books, and forums. If you want to go deeper, check out resources like Wikipedia’s fishing lure page for history and advanced methods.
Frequently Asked Questions
How Long Does It Take To Make A Fishing Lure Mold?
The total time depends on your materials and experience. For a two-part silicone mold, you’ll need about 30 minutes for setup and mixing, plus 8–16 hours for the silicone to cure (most of this is waiting time). Once you have your mold, making each lure takes only a few minutes.
What Is The Best Material For Making Fishing Lure Molds?
For soft plastic lures, silicone rubber is the most popular. It captures fine details, is safe to use, and lasts for many casts. For hard baits or jigs, aluminum is preferred because it handles heat and repeated use without warping.
Can I Make Molds From Household Items?
Yes, some anglers use plaster of Paris, clay, or even two-part epoxy for simple molds. However, these materials often wear out quickly or don’t capture detail as well as silicone. For best results, invest in proper mold-making silicone.
How Many Lures Can I Make With One Mold?
A high-quality silicone mold can make hundreds of lures before showing wear. Cheaper or homemade molds may only last for 20–30 casts. Cleaning and storing your mold properly extends its life.
Is Making Fishing Lure Molds Safe For Beginners?
With basic safety steps—like wearing gloves, using good ventilation, and following instructions—lure making is safe for beginners. The main risks are burns from hot plastic or lead, and exposure to fumes. Always work carefully and keep your workspace clean.
Making your own fishing lure molds is a journey that combines creativity, patience, and practical skill. The first few tries might not be perfect, but every mistake is a step toward mastering the process. Soon, you’ll have a tackle box full of custom baits and the satisfaction of catching fish with lures you made yourself.