
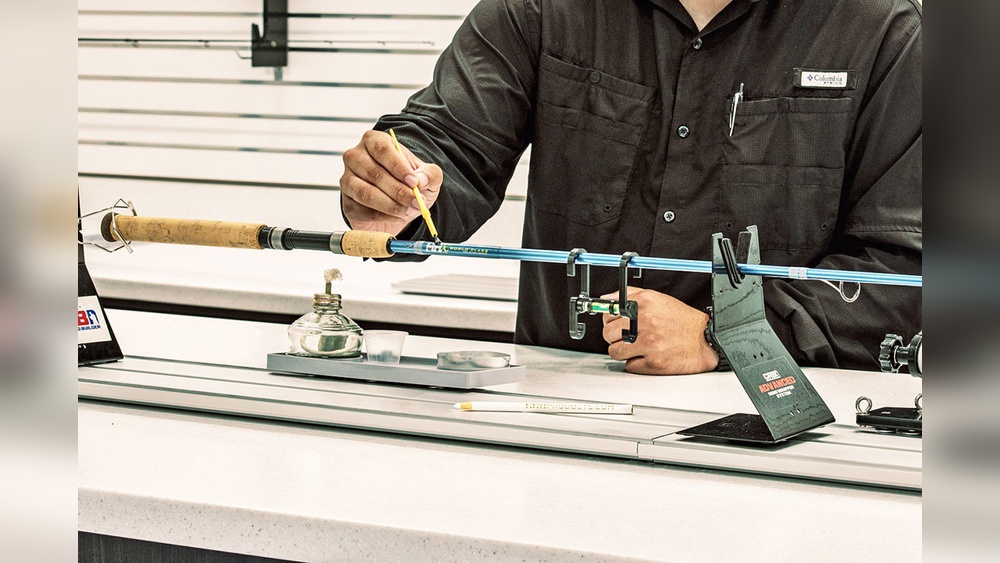
Building your own custom fishing rod is a unique experience. It’s a hands-on way to create equipment that matches your fishing style, target species, and personal preferences. Many anglers find that a custom rod performs better than store-bought options, and the process itself teaches valuable lessons about fishing gear.
This guide will walk you through every step, from choosing parts to final finishing. By the end, you’ll have the knowledge to craft a rod that fits your hand, your needs, and your dreams.
Why Build A Custom Fishing Rod?
Anglers choose custom rods for many reasons. The most obvious is personalization. Store-bought rods are made for the average user, but your hand size, casting style, and favorite fish might be different. A custom rod can balance perfectly, have the right action, and even reflect your favorite colors.
Custom rods are also about performance. Serious anglers notice that a rod’s sensitivity, strength, and weight affect their success. When you build your own, you can use high-quality materials and match the rod’s action to your target fish. Plus, there’s a special pride in catching fish with gear you made yourself.
Finally, custom rods can last longer. You pick the components, so you can invest in the best guides, reel seats, and handles. Repairs are easier because you know exactly how your rod is built. For many, the process becomes as enjoyable as fishing itself.
Understanding The Key Parts Of A Fishing Rod
Before starting, it’s important to know the main parts:
- Rod blank: The long, tapered shaft that forms the rod’s backbone.
- Guides: Rings along the rod that direct the fishing line.
- Tip top: The final guide at the very end of the rod.
- Reel seat: Holds the reel in place.
- Handle/grip: Where you hold the rod.
- Thread wraps: Decorative thread that secures guides to the blank.
- Finish/epoxy: Seals thread wraps and adds durability.
Each part affects how the rod feels, looks, and performs. Choosing the right components is the first big step.
Credit: www.floridasportsman.com
Choosing The Right Rod Blank
The rod blank is the heart of your fishing rod. It determines the rod’s strength, action, and sensitivity.
Factors To Consider
- Material: Most blanks are made from graphite (light, sensitive, but can be brittle) or fiberglass (stronger, heavier, more forgiving). There are also composite blanks that mix both.
- Length: Longer rods (over 7 feet) cast farther and pick up more line, while shorter rods offer better control and power.
- Action: This describes how much and where the rod bends. Fast action bends near the tip, medium near the middle, slow bends throughout. Fast action is good for quick hooksets; slow action is better for gentle presentations.
- Power: This is the rod’s strength—ultra-light, light, medium, or heavy. Choose based on your target species.
Example: Bass Fishing Rod
If you fish for largemouth bass, a 7-foot medium-heavy graphite blank with fast action is a popular choice.
Table: Common Rod Blank Types And Their Uses
| Blank Material | Main Benefit | Best For |
|---|---|---|
| Graphite | Sensitivity, light weight | Bass, trout, walleye |
| Fiberglass | Durability, flexibility | Catsfish, trolling, saltwater |
| Composite | Balanced traits | General use, beginners |
Pro tip: Don’t pick the lightest blank unless you fish only small species. Heavier blanks are more forgiving and last longer for general use.
Selecting The Right Components
After you have your blank, it’s time to choose the rest of the parts.
Guides
Guides keep your line controlled and reduce friction. The number and size of guides affect casting and sensitivity.
- Material: Stainless steel (strong, affordable), titanium (ultra-light, corrosion-resistant, expensive), ceramic inserts (smooth, minimize line wear).
- Type: Single-foot guides are lighter; double-foot guides are stronger.
Reel Seat
The reel seat holds your reel in place. Look for:
- Comfort: Try gripping different shapes.
- Material: Graphite (lightweight), aluminum (strong), or a mix.
- Locking mechanism: Make sure it fits your reel type (spinning or baitcasting).
Handle/grip
The handle is critical for comfort. Options include:
- Cork: Lightweight, warm, classic look, but can chip.
- EVA foam: Durable, easy to clean, less expensive.
- Split grip: Lighter, more sensitive.
- Full grip: Heavier, more comfortable for heavy fish.
Thread And Finish
Thread holds guides in place and can be decorative. Rod building thread is strong and comes in many colors. The finish (epoxy or resin) protects the thread and rod.
Tip Top
Choose a tip top that matches your blank’s diameter and line type. Some have ceramic inserts for better durability.
Table: Handle Material Comparison
| Material | Weight | Durability | Grip in Wet |
|---|---|---|---|
| Cork | Light | Medium | Good |
| EVA Foam | Light | High | Excellent |
| Rubberized Cork | Medium | High | Excellent |
Insight: Beginners often overlook guide quality. Cheap guides can cut your line or rust quickly. Invest here for fewer headaches later.

Credit: duluthfolkschool.com
Tools And Materials Needed
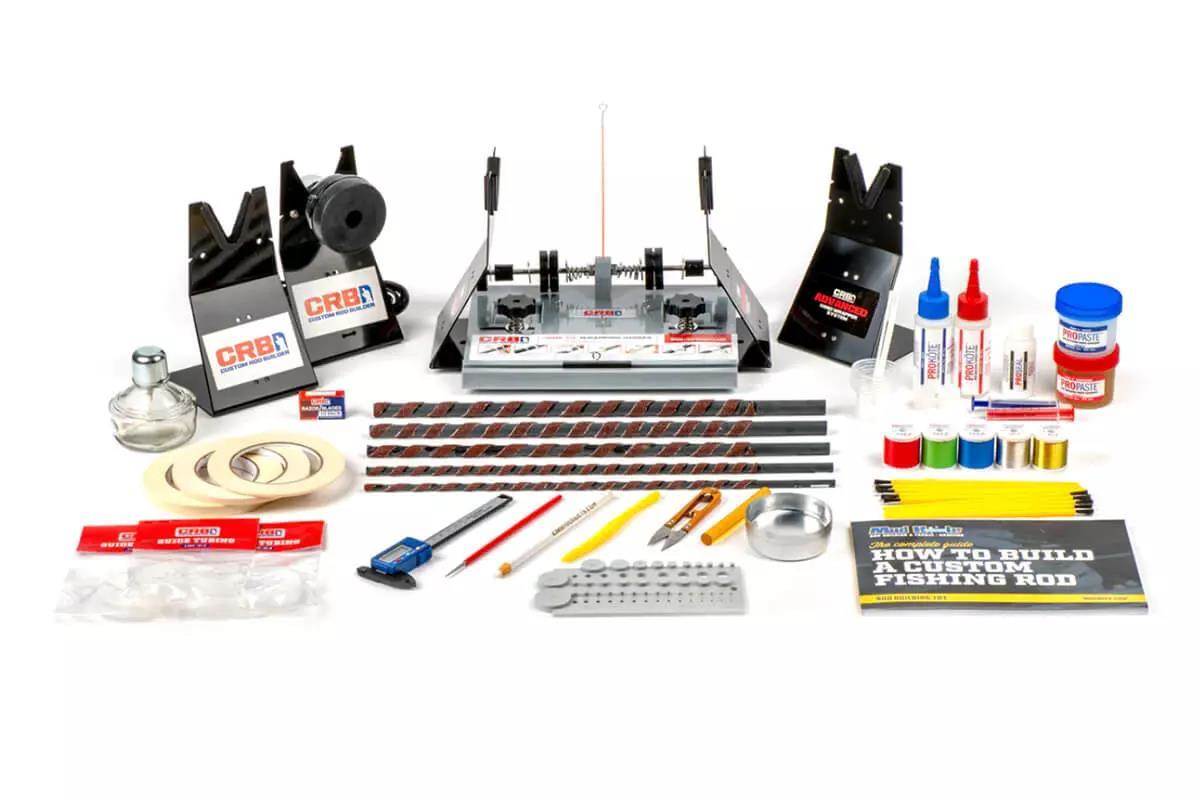
Having the right tools makes the process easier and more accurate. Here’s what you’ll need:
- Rod wrapper: Holds the rod while wrapping thread.
- Drying motor: Spins the rod while finish dries (prevents drips).
- Thread: Special rod building thread.
- Epoxy: Two-part finish for thread wraps.
- Brushes: For applying epoxy.
- Utility knife or razor blade: For trimming thread.
- Measuring tape or ruler: For guide placement.
- Masking tape: For temporary holding.
- Sandpaper: For smoothing rough edges.
- Mixing cups and sticks: For epoxy.
- Alcohol wipes: For cleanup.
You can buy a rod building kit that includes many of these tools, which can save money for beginners.
Planning Your Build
A good plan prevents mistakes. First, decide the rod’s purpose—what fish, what water, what lures? This guides every choice.
Balance is key. A heavy handle with a light blank feels awkward. Try to keep the rod balanced near the front of the handle.
Guide spacing affects casting and sensitivity. Most blanks come with a recommended guide layout. Mark guide positions with pencil before wrapping.
Color scheme is personal, but consider visibility. Bright wraps are easier to see in low light; dark wraps look more classic.
Step-by-step Guide To Building A Custom Fishing Rod
This section covers each part of the process, with tips and warnings for beginners.
1. Preparing The Rod Blank
Start by cleaning the blank with alcohol wipes. Remove dirt, oil, and fingerprints. Inspect for cracks or chips. If you find defects, contact the supplier before starting assembly.
Determine the spine of the blank. The spine is the direction where the blank naturally bends. Guides should be placed on the spine for best performance. To find it, roll the blank on a flat surface while pressing down gently. The blank will “pop” into the spine direction.
2. Fitting The Handle And Reel Seat
Dry fit all handle components before gluing.
- Slide the reel seat and handle onto the blank to check fit.
- If the fit is loose, build up the blank with masking tape arbors.
- For cork or EVA, sand gently for a perfect fit.
Mix a small batch of epoxy. Apply it evenly to the blank and inside the reel seat and handle. Slide the parts into place, clean up excess epoxy, and let dry fully (usually 24 hours).
3. Placing And Wrapping The Guides
Use the guide layout chart or manufacturer’s recommendations to mark guide positions. Tape each guide in place.
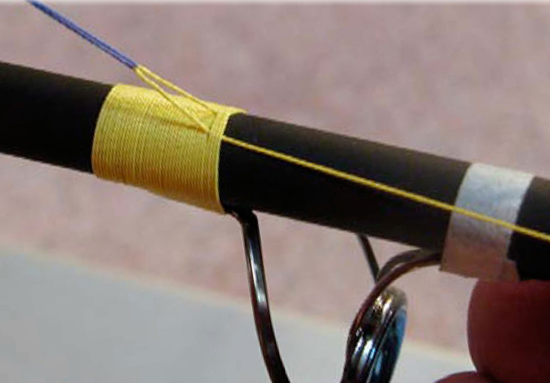
Begin wrapping thread at the foot of the first guide. Turn the rod wrapper slowly and lay thread wraps tight and even. Use a burnishing tool or fingernail to smooth the wraps. Trim thread ends with a razor blade.
Common mistake: Wrapping too loosely. Loose wraps unravel and look sloppy. Practice on a dowel before starting your rod.
4. Attaching The Tip Top
Apply a drop of hot melt glue or epoxy to the blank tip. Slide the tip top in place, align with the guides, and let set.
5. Applying The Finish
Mix two-part epoxy according to instructions. Apply a thin, even coat over all thread wraps with a small brush. Turn the rod slowly (by hand or with a drying motor) to prevent drips and sags. Let cure for 24-48 hours in a dust-free area.
Non-obvious insight: Temperature and humidity affect epoxy curing. Work in a clean, warm room for best results.
6. Final Inspection
Inspect all wraps for gaps or bubbles. Make sure the guides are aligned and the finish is smooth. Check the balance and feel by mounting your reel and making a few practice casts (without a hook or lure).
Customizing Your Rod: Beyond The Basics
After you’ve mastered the basics, you can add even more personal touches.
- Custom thread art: Decorative patterns, names, or fish images.
- Unique handles: Use wood, carbon fiber, or colored EVA foam.
- Colored guides or tip tops: For style and visibility.
- Engraving: Add your name or a special message to the reel seat.
These customizations make your rod truly unique and can be a great way to show off your craftsmanship.
Credit: onthewater.com
Common Problems And How To Avoid Them
Building a rod is detailed work. Even experienced builders make mistakes. Here are some frequent issues:
- Misaligned guides: Double-check alignment before applying epoxy. Even one crooked guide affects casting.
- Bumpy thread wraps: Practice wrapping and use good tension. Burnish threads for smoothness.
- Bubbles in finish: Mix epoxy slowly to avoid air. Pop bubbles with a gentle breath or a heat source.
- Loose handles or reel seats: Use enough epoxy and check fit before gluing.
- Epoxy drips or sags: Turn the rod while the finish cures.
If you make a mistake, don’t panic. Many problems can be fixed by removing and rewrapping the affected area.
How Much Does It Cost To Build A Custom Rod?
Custom rods can be cheaper or more expensive than store-bought, depending on your choices.
Table: Estimated Cost Breakdown
| Component/Tool | Budget | Premium |
|---|---|---|
| Rod Blank | $30–$70 | $100–$300 |
| Guides Set | $10–$25 | $40–$100 |
| Handle/Grip | $8–$20 | $30–$70 |
| Reel Seat | $7–$15 | $25–$60 |
| Thread/Epoxy | $15–$30 | $30–$50 |
| Tools (one-time) | $40–$100 | $150–$300 |
A simple custom rod can cost around $100–$150 if you already have tools. Premium builds can reach $400 or more. But remember, your rod will be unique and exactly suited to your fishing.
Non-obvious insight: Buying components in bulk or sharing tools with friends can lower costs. Many rod builders build several rods to spread tool costs.
Safety Tips
- Work in a ventilated area when using epoxy or glue.
- Wear gloves and a mask if you’re sensitive to chemicals.
- Keep sharp tools away from children.
- Clean up spills immediately to avoid accidents.
Learning Resources
The rod building community is large and supportive. Many online forums and videos show advanced techniques. Local fishing shops sometimes offer classes. For more details on rod building basics, the Wikipedia page on fishing rods provides a solid overview.
Taking Your Custom Rod Fishing
Once your rod is ready, test it in a safe place. Start with light casts, check for any loose parts, and make sure the rod feels balanced. If anything feels wrong, fix it before going after big fish. Over time, you’ll learn what works and can adjust your next build.
Making your own rod gives you a deeper connection to the sport. You’ll notice small details in every catch, and repairs become easy. Many anglers say their custom rods catch more fish—not just because of the design, but because of the confidence they bring.
Frequently Asked Questions
How Long Does It Take To Build A Custom Fishing Rod?
Building your first rod usually takes 8 to 12 hours spread over a few days. Most of this time is for epoxy curing. With practice, you’ll finish faster.
Is Building A Custom Rod Cheaper Than Buying One?
It can be, especially if you build more than one rod or use basic components. High-end custom rods may cost more than store-bought, but the quality and fit are often much better.
Do I Need Special Tools To Build A Rod?
A few special tools help a lot: a rod wrapper, drying motor, and good thread. You can make a simple rod wrapper from books or boxes if you’re creative.
Can I Repair My Custom Rod If It Breaks?
Yes. One big benefit is easy repairs. You can replace guides, handles, or even the tip top at home. If the blank itself snaps, you may need a new one.
Where Can I Learn More Advanced Rod Building Techniques?
Many online resources offer advanced tips. Look for rod building forums, YouTube channels, or classes at local tackle shops. The Mud Hole Custom Tackle website is a great place to find supplies and guides.
Building a custom fishing rod is a rewarding journey. With patience and care, you’ll create not just a tool, but a fishing companion that tells your story every time you cast.