
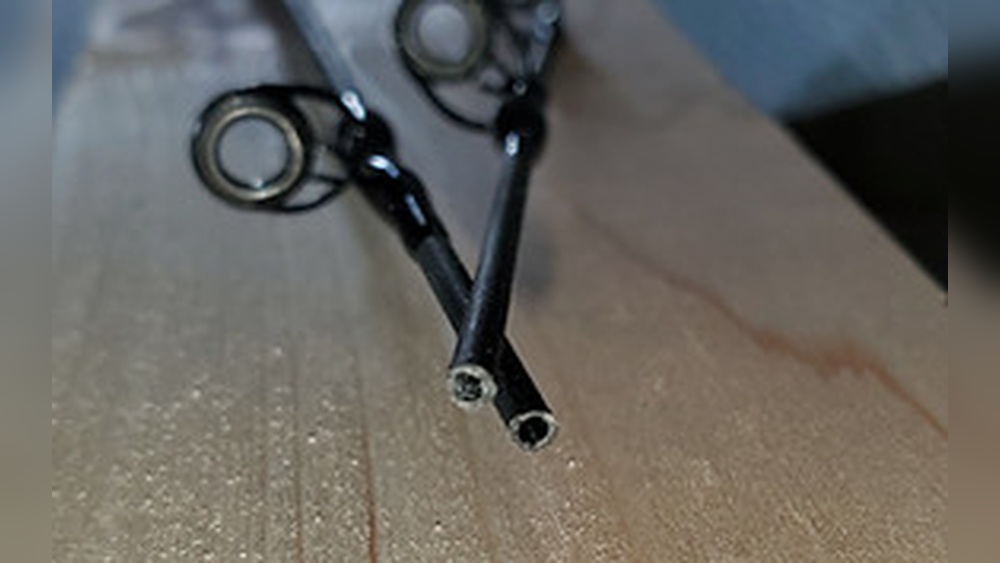
Fishing brings joy, relaxation, and sometimes the thrill of adventure. But nothing ruins a day faster than seeing your fishing rod snap or break. Many anglers wonder, “Can you repair a broken fishing rod?” The good news is that in most cases, you can. With the right tools, patience, and knowledge, you can restore your rod and get back to fishing. This article will guide you through everything you need to know: types of breaks, repair methods, costs, tips, common mistakes, and when to consider professional help.
Understanding Fishing Rod Breaks
Fishing rods can break in several ways. Knowing the type of damage helps decide if repair is possible and which method works best.
Types Of Fishing Rod Breaks
- Tip Breaks: The small end of the rod (the tip) snaps. This is common and usually easy to fix.
- Mid-Section Breaks: The rod breaks somewhere in the middle. This needs more careful repair.
- Guide Damage: The metal rings (guides) come loose, bend, or break.
- Handle Damage: The grip or reel seat breaks or cracks.
- Ferrule Splits: The joint between rod sections splits or cracks.
Each break has its own challenges. Tip breaks are often quick fixes, while mid-section and handle damage require more steps and materials.
Why Rods Break
Fishing rods are made from graphite, fiberglass, or carbon fiber. These materials are strong but not indestructible. Common reasons for breakage include:
- High tension when fighting large fish
- Accidentally stepping or sitting on the rod
- Incorrect storage
- Old or worn-out materials
- Manufacturing defects
A rod’s material and quality affect how easy it is to repair and how strong it will be after fixing.
Can You Repair A Broken Fishing Rod?
Yes, you can often repair a broken fishing rod. But not every break is worth fixing. If the damage is too severe, like a shattered rod or split handle, replacement may be better.
When Is Repair Possible?
Repair is possible when:
- The break is clean (not splintered into many pieces)
- The rod is not broken in multiple places
- Guides are just bent or loose, not missing entirely
- The handle or reel seat has minor cracks
If the rod’s core structure is destroyed, repairs may not restore its strength or performance.
When Should You Replace Instead Of Repair?
Sometimes, repairing isn’t cost-effective or safe. Replace your rod when:
- It’s broken in several places
- The blank (main shaft) is shattered
- The rod is old and weak
- Repairs would cost more than a new rod
- Safety and performance are compromised
Professional anglers often replace rods for reliability, but hobbyists may choose repair to save money.
Tools And Materials Needed For Repair
Fixing a fishing rod requires some basic tools and materials. The exact items depend on the type of break.
Common Repair Tools
- Epoxy glue (strong, waterproof)
- Rod wrapping thread
- Sandpaper
- Super glue
- Heat shrink tubing
- Replacement guides
- Guide wrapping tape
- Small saw or cutter
- Needle or tweezers
- Clamps
Having these tools ready makes the repair process smoother.
Materials Based On Rod Type
- Graphite rods: Use strong epoxy and graphite tubes for reinforcement.
- Fiberglass rods: Fiberglass rods can be fixed with fiberglass cloth and resin.
- Carbon fiber rods: Use lightweight carbon fiber tubes and special adhesives.
Choosing the right materials is key. Using the wrong glue or reinforcement can cause the rod to break again.
Step-by-step Repair Methods
Different breaks require different repair methods. Let’s look at how to fix the most common types of fishing rod damage.
Repairing A Broken Rod Tip
This is the most frequent break and the easiest to fix.
- Cut off the damaged tip: Use a saw to trim any splintered parts.
- Sand the cut area: Smooth out the edges with sandpaper.
- Insert a new tip: Buy a replacement tip guide. Apply super glue and slide it onto the rod.
- Let it dry: Hold the tip in place for several minutes. Let the glue cure for at least an hour.
Most anglers can do this repair themselves. The rod will be a little shorter but still usable.
Fixing A Mid-section Break
Mid-section breaks are harder but possible.
- Align the broken pieces: Make sure both ends fit together cleanly.
- Reinforce the area: Use a graphite or fiberglass tube (called a “sleeve”) slightly larger than the rod diameter.
- Sand the rod ends: Smooth the surface for better glue adhesion.
- Apply epoxy glue: Coat the inside of the sleeve and the rod ends.
- Slide the sleeve over the break: Clamp it gently until the glue sets.
- Wrap the repair area: Use rod wrapping thread and guide wrapping tape for extra strength.
- Let it cure: Wait at least 24 hours before using.
This repair restores strength but may affect rod flexibility. It’s important to align the rod perfectly.
Replacing Damaged Guides
Guides are easy to replace:
- Remove old guide: Cut the wrapping and gently pull off the broken guide.
- Position the new guide: Align it with the rod’s spine.
- Wrap with thread: Secure the guide using rod wrapping thread.
- Apply epoxy: Coat the thread with epoxy for durability.
- Let it dry: Wait overnight.
Replacing guides improves casting and prevents line damage.
Repairing Handle Or Reel Seat
Handles and reel seats require more skill.
- Remove broken parts: Use a cutter or saw to remove damaged handle material.
- Clean the area: Sand and wipe clean.
- Fit replacement: Buy a compatible handle or reel seat. Test fit before gluing.
- Apply epoxy: Secure the new part in place.
- Clamp and cure: Hold with clamps and let dry for 24 hours.
Handles affect comfort, so take time to ensure a good fit.
Comparing Repair Methods: Strength Vs. Flexibility
Choosing the right repair method affects rod performance. Here’s a comparison of common repair approaches:
| Repair Method | Strength After Repair | Flexibility | Ease of DIY |
|---|---|---|---|
| Tip Replacement | High | Almost unchanged | Easy |
| Mid-Section Sleeve | Medium | Reduced | Moderate |
| Guide Replacement | High | Unchanged | Easy |
| Handle Repair | Medium | Unchanged | Moderate |
Tip repairs keep the rod nearly original, while mid-section repairs may make the rod stiffer.
Cost Of Repair Vs. Buying New
Repairing a rod can be cheaper than buying a new one, but it depends on the damage and rod value.
Typical Costs
- Tip repair: $5–$15
- Guide replacement: $3–$20 per guide
- Mid-section break: $20–$50 (including materials)
- Handle repair: $15–$40
Professional repair services may charge $50–$100, depending on the complexity.
Cost Comparison Table
Here’s a quick look at costs for repairing versus buying new:
| Repair Type | DIY Cost | Professional Cost | New Rod Cost |
|---|---|---|---|
| Tip | $5–$15 | $20–$35 | $30–$250 |
| Guide | $3–$20 | $25–$40 | $30–$250 |
| Mid-Section | $20–$50 | $60–$100 | $30–$250 |
| Handle | $15–$40 | $40–$80 | $30–$250 |
If your rod is high-end, repair is often worth it. For cheaper rods, buying new may make more sense.

Credit: www.wikihow.com
Common Mistakes When Repairing Fishing Rods
Many beginners make mistakes that can ruin the repair or damage the rod further.
Top Mistakes To Avoid
- Using the wrong glue: Not all glues are waterproof or strong enough.
- Misaligning rod sections: This affects casting and rod action.
- Skipping sanding: Uneven surfaces lead to weak bonds.
- Over-tightening clamps: This can crush the rod.
- Rushing the drying process: Not letting glue cure fully means weak repairs.
- Choosing poor materials: Using cheap sleeves or guides reduces durability.
- Ignoring rod balance: Adding too much weight or stiffness changes how the rod feels.
Avoiding these mistakes makes your repair last longer and perform better.
Practical Tips For Successful Rod Repair
Here are some tips based on experience that many beginners miss:
- Measure twice, cut once: Always double-check before trimming or cutting parts.
- Test fit before gluing: Make sure everything fits well before using epoxy.
- Use slow-drying epoxy: It creates a stronger bond than fast-drying glue.
- Wrap with tension: When wrapping guides, keep thread tight but not too tight.
- Label your repairs: Mark repaired sections so you can monitor them over time.
A well-repaired rod can last years if you follow these tips.

Credit: www.mitouch-traduction.com
When To Seek Professional Help
DIY rod repair is rewarding, but sometimes it’s best to call a pro.
Signs You Need Professional Repair
- Multiple breaks or complex damage
- Expensive or custom rods
- Ferrule splits or joint damage
- You lack tools or materials
- Repairs don’t hold after DIY attempts
Professional rod builders have specialized tools and experience. For high-value rods, pro repair is often safer.
How To Prevent Fishing Rod Breaks
Preventing damage is better than repairing. Here’s how to keep your rod safe:
- Store properly: Use rod racks or cases. Avoid leaving rods in cars or on the ground.
- Clean after use: Saltwater, dirt, and sand can weaken materials.
- Avoid overloading: Know your rod’s strength. Don’t force big fish.
- Check for wear: Inspect guides, tips, and handles regularly.
- Transport carefully: Use protective tubes or sleeves.
These habits save money and frustration.
How Long Will A Repaired Rod Last?
A repaired rod’s lifespan depends on the repair quality and rod use.
Factors Affecting Durability
- Repair quality: A well-done repair can last several years.
- Type of break: Tip repairs usually last longer than mid-section repairs.
- Usage: Heavy use can stress repaired areas.
- Materials used: High-quality epoxy and reinforcement improve longevity.
Some anglers report fishing with repaired rods for many seasons, while others see repairs fail after a few trips. Regular inspection helps catch new issues early.
Diy Vs. Professional Repair: Which Is Better?
Choosing between DIY and professional repair depends on your skill, tools, and the rod’s value.
Diy Repair Pros And Cons
Pros:
- Saves money
- Learn new skills
- Quick turnaround
Cons:
- Risk of mistakes
- May not restore full strength
- Limited by available tools
Professional Repair Pros And Cons
Pros:
- Expert results
- Strong, reliable repair
- Handles complex damage
Cons:
- Higher cost
- May take longer
- Sometimes not available locally
If you’re confident and have the right tools, DIY is fine for simple breaks. For expensive or complicated repairs, professional help is best.
Real-life Examples And Data
Many anglers fix their own rods every year. Surveys show:
- About 70% of recreational anglers have tried to repair a rod themselves.
- Of those, around 60% report successful repairs.
- Most common repairs: Tip replacement and guide fixing.
Professional rod builders often use graphite sleeves or custom wraps for mid-section breaks. These can restore up to 80% of original strength.
A good example: An angler fixed a mid-section break using a graphite sleeve and epoxy. After repair, the rod caught several large bass with no issues.
Comparing Rod Materials For Repair
Different rod materials affect repair success. Here’s a comparison:
| Rod Material | Repair Difficulty | Strength After Repair | Common Repair Method |
|---|---|---|---|
| Graphite | Moderate | Medium | Epoxy + Graphite Sleeve |
| Fiberglass | Easy | High | Epoxy + Fiberglass Cloth |
| Carbon Fiber | Hard | Medium | Epoxy + Carbon Tube |
Fiberglass rods are easier to fix and often stronger after repair.

Credit: www.youtube.com
Frequently Asked Questions
Can I Repair A Rod Broken In Half?
Yes, if the break is clean and not splintered. Use a sleeve and epoxy to join the pieces. However, the rod may be stiffer and less flexible after repair.
What Glue Is Best For Fishing Rod Repair?
Use epoxy glue designed for fishing rods or waterproof repairs. Avoid regular super glue, as it’s not flexible or strong enough.
Will The Repaired Rod Be As Strong As Before?
Usually, a repaired rod is not quite as strong as the original. Tip and guide repairs restore most strength, but mid-section fixes can make the